Have you ever regretted a room makeover as soon as you’ve put the paint tins away as I have during my period house restoration?
Yes, we’ve all been there. Sometimes the colour just isn’t what you imagined or it doesn’t suit your room. Over time we also want a change or a different look.
I’m not exaggerating when I say I’ve decorated some of my rooms four times in 14 years. This is much to my partner’s frustration and my embarrassment!
My partner always knows the opening line of “I’ve had an idea…” means lots of dust, stripping and a paint stained kitchen sink!
I didn’t have the money, knowledge or interest to restore the rooms to their current standard and authenticity when I moved in 2004. Much of this journey has been a learning curve.
However, I would’ve saved a lot of time and money if I had a clearer vision earlier on!
See my before and after section to see the restoration journey in full so far.
My parlour showcases this journey best. It also illustrates the different approaches you may want to take with your period house restoration.
Scheme 1
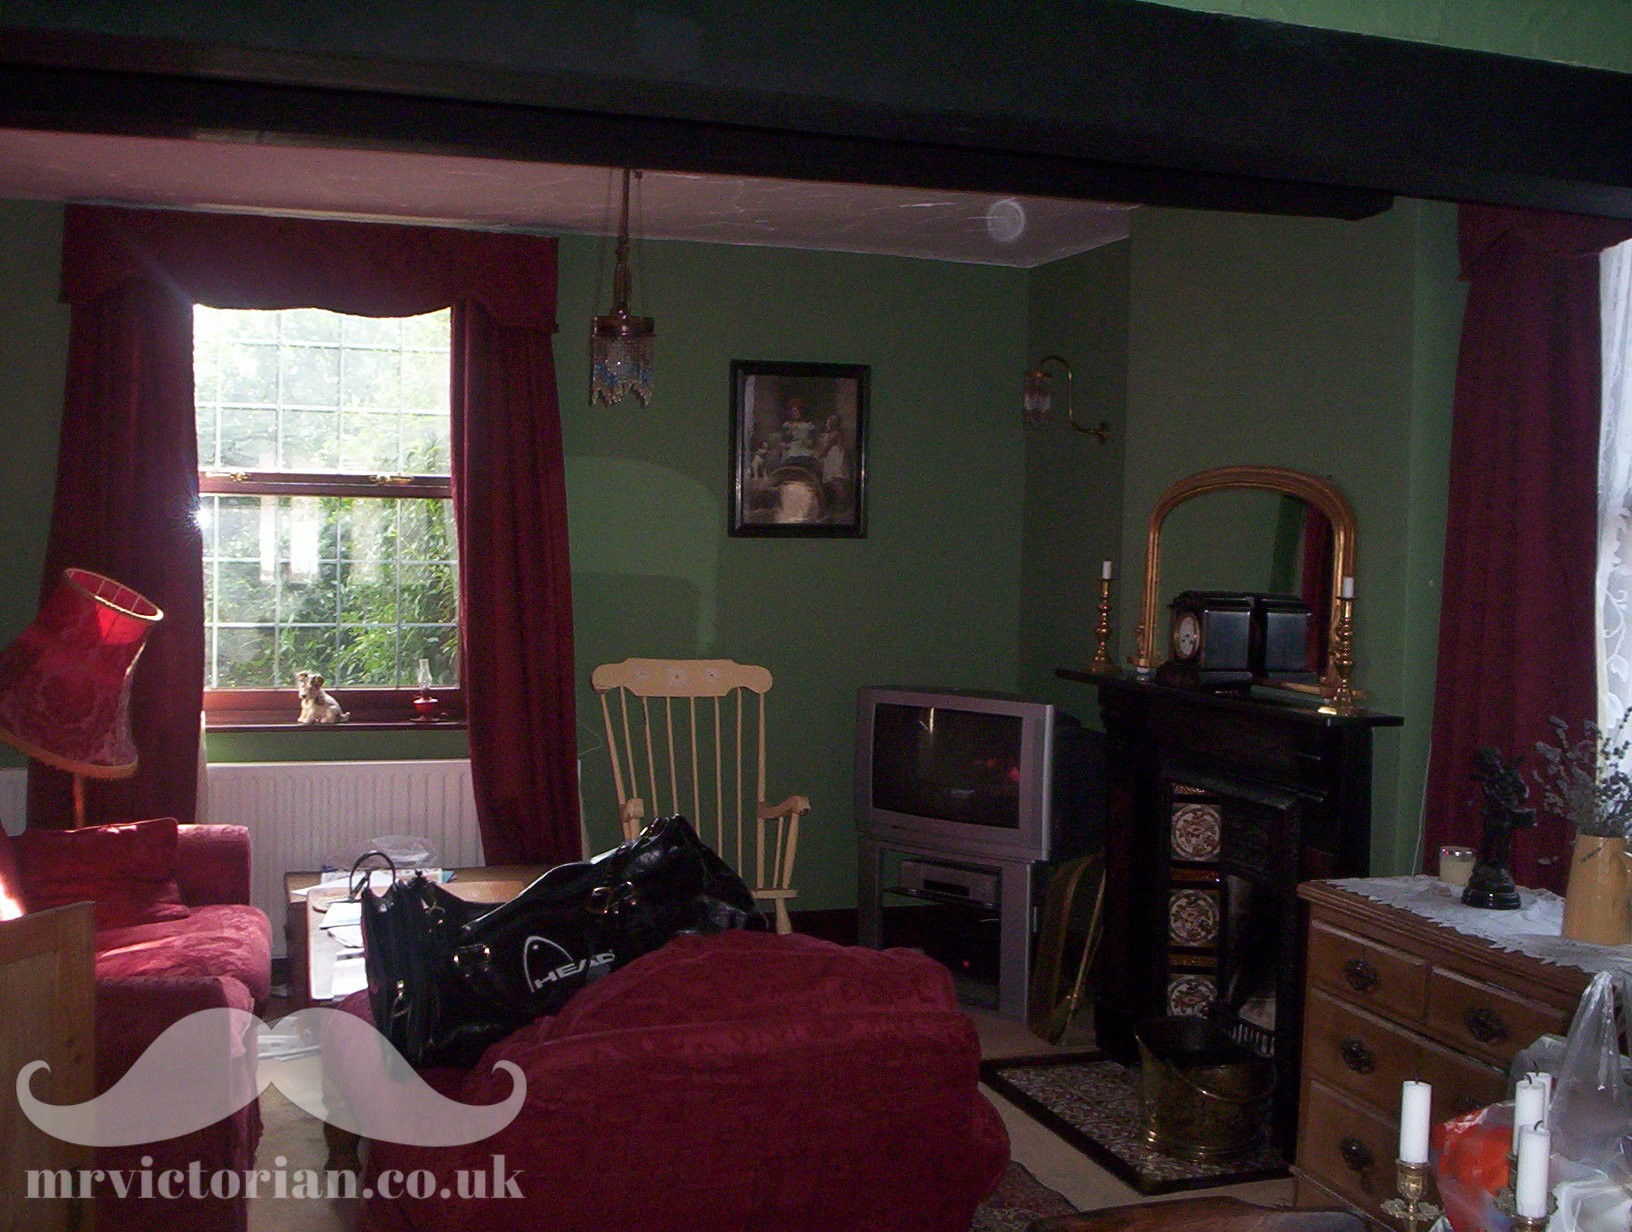
When I first moved into my humble abode the parlour’s only original features was the Victorian fireplace, beam, door and some of its original floorboards.
Unfortunately, it also had a lovely ‘ice cream’ Artex ceiling, a white carpet and an opening into the dining room.
So not very Victorian!
In my naivety, I thought a nice ‘Victorian’ green paint and a few mismatched antiques would make all the difference.
The stripped pine Victorian chest of drawers was more 1990s bedroom than 1890s parlour!
Scheme 2
Scheme 1 didn’t last long as I started to have a love affair with Victorian-style wallpaper.
I didn’t have much money back then and couldn’t find the right design for my humble cottage. It was the time when huge floral designs were back in fashion (these were more authentic than I thought but I won’t spoil the story!).
I found 20 unused rolls of early 1990s Laura Ashley wallpaper on Ebay.
I loved the simple small design and its dark red hues ticked what I thought was that illusive ‘period house restoration’ box.
At this point I also got rid of the Artex ceiling (hurrah!).
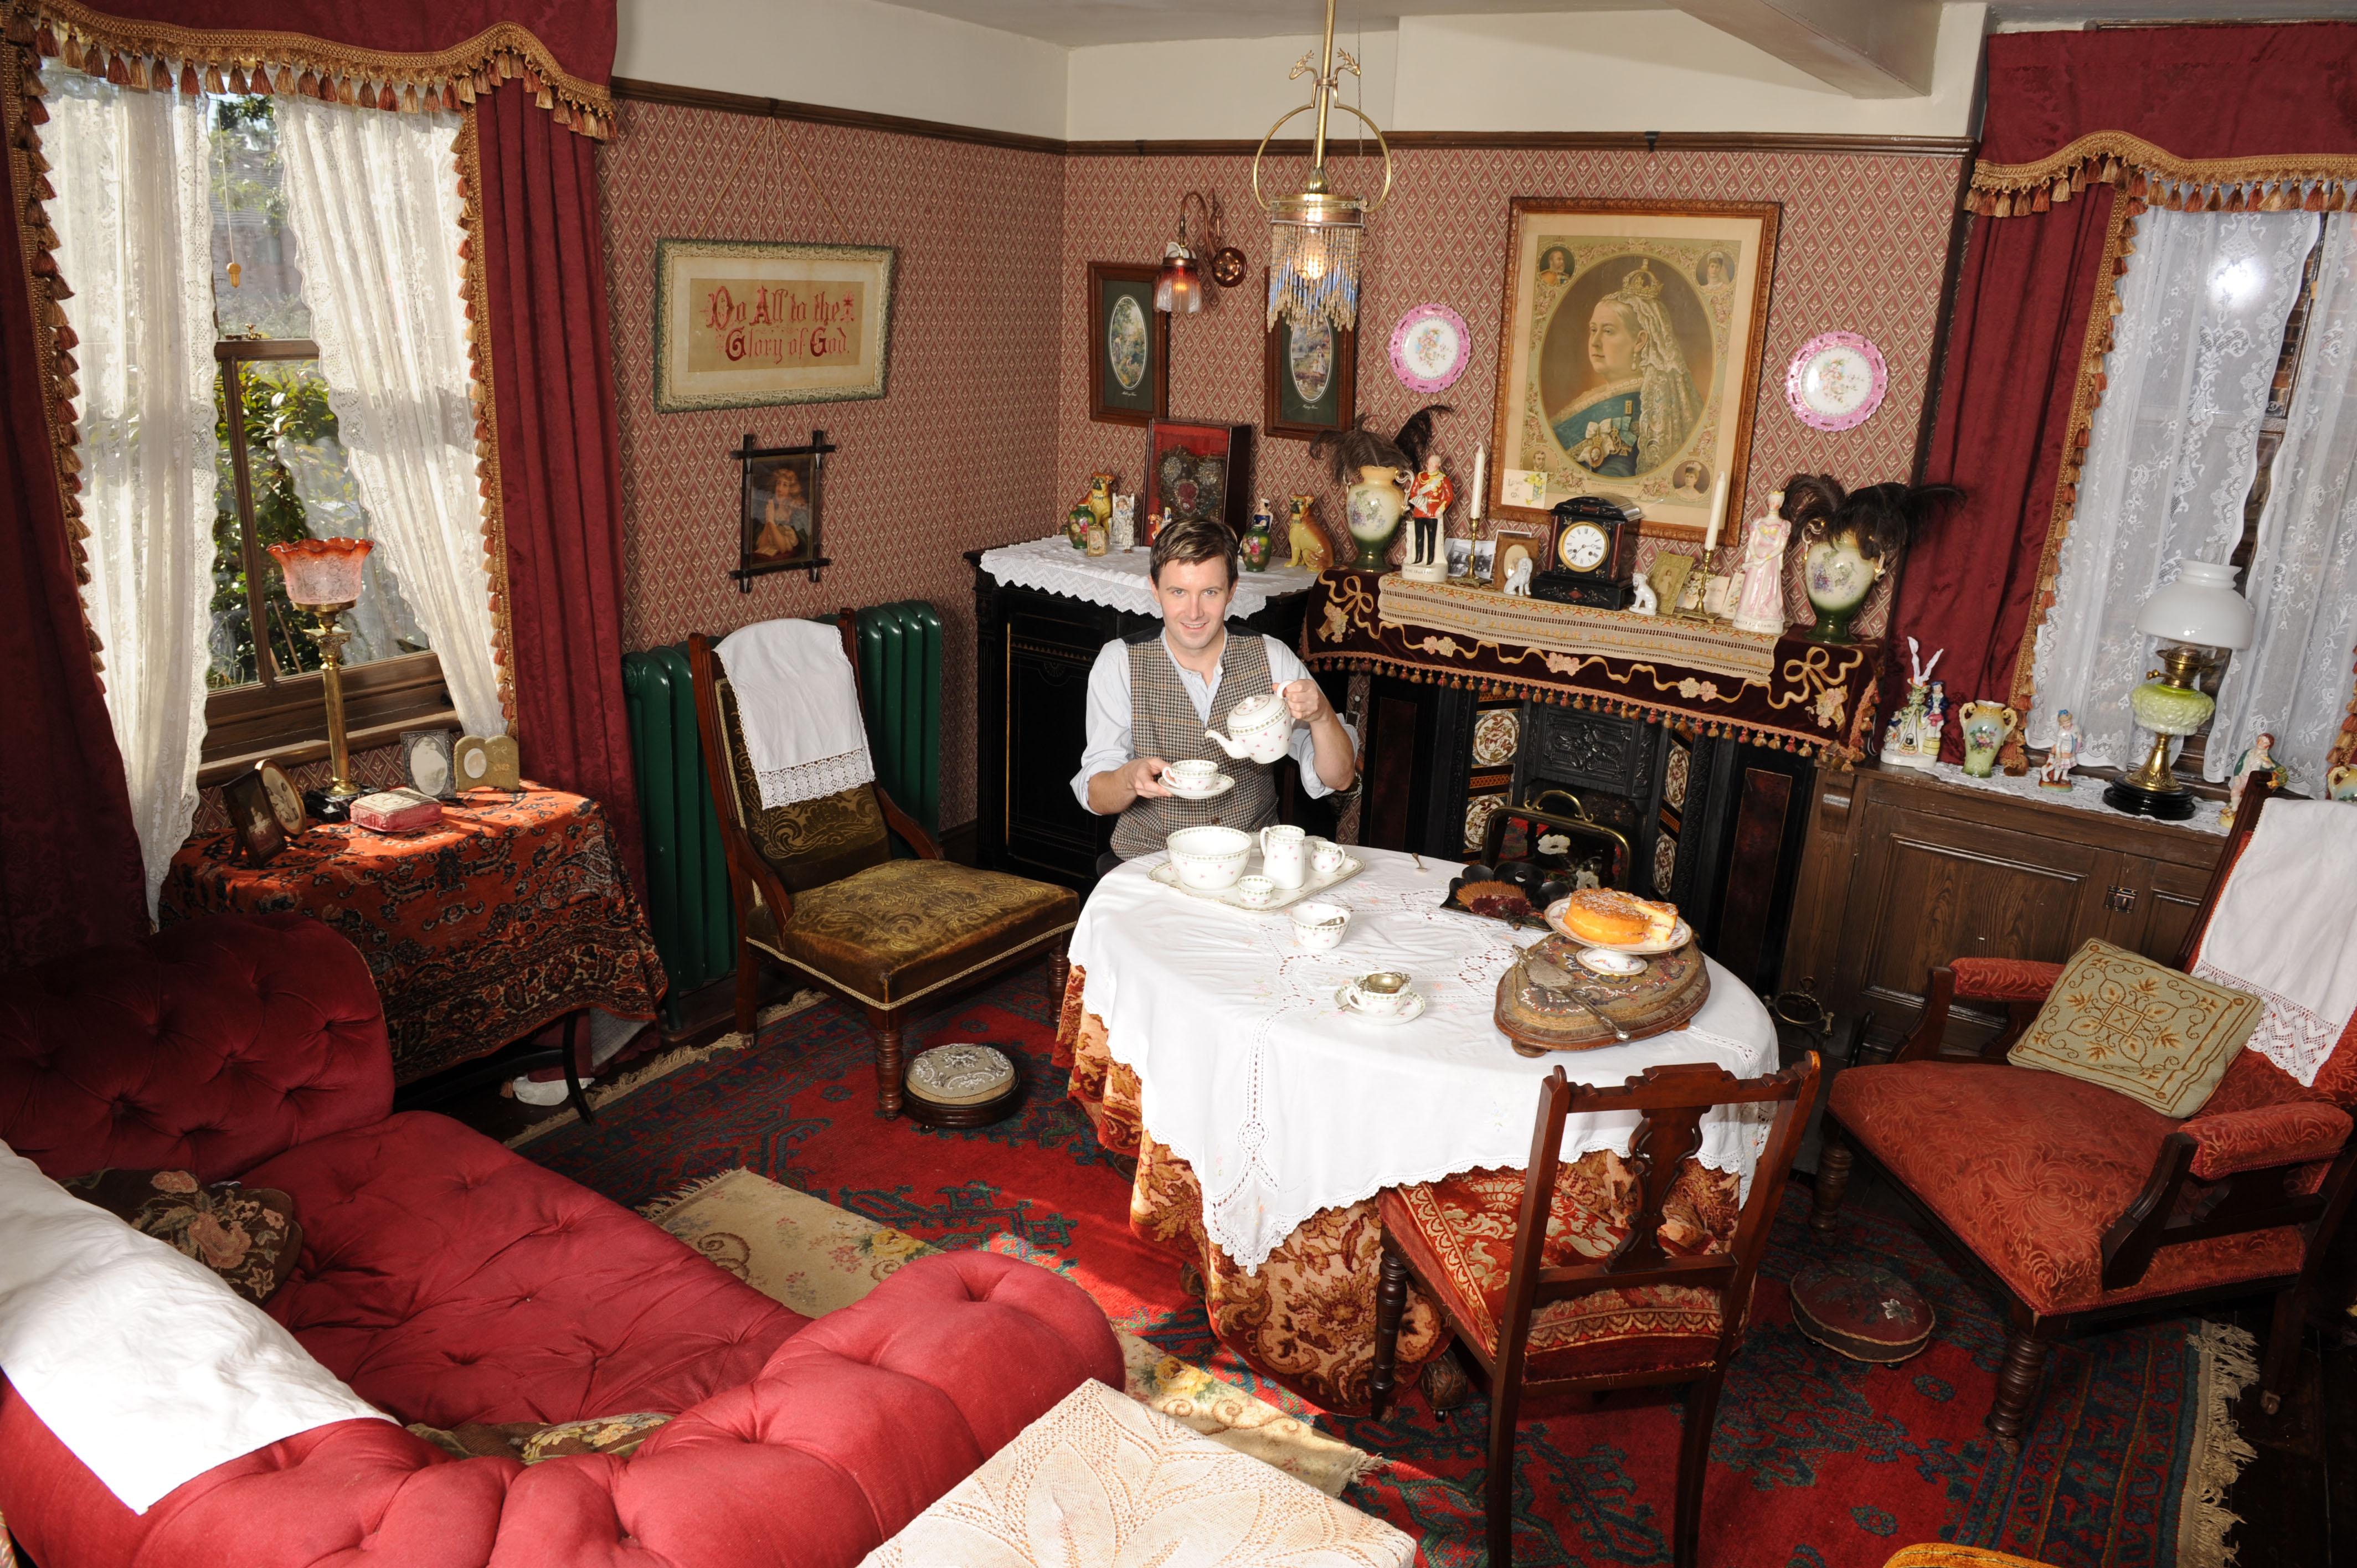
I lived with this look for a couple of years but yearned for a wallpaper that was actually designed in the Victorian period.
Scheme 3
I was unable to find the right Victorian designed wallpaper in the UK. Thankfully I realised that high-end William Morris designs in a Victorian working-class cottage were as authentic as a jumbo jet in a period drama!
I found this lovely 1890-1910 wallpaper from American Collectibles (no longer around). It was an expensive choice, especially as shipping from the US is far from cheap!
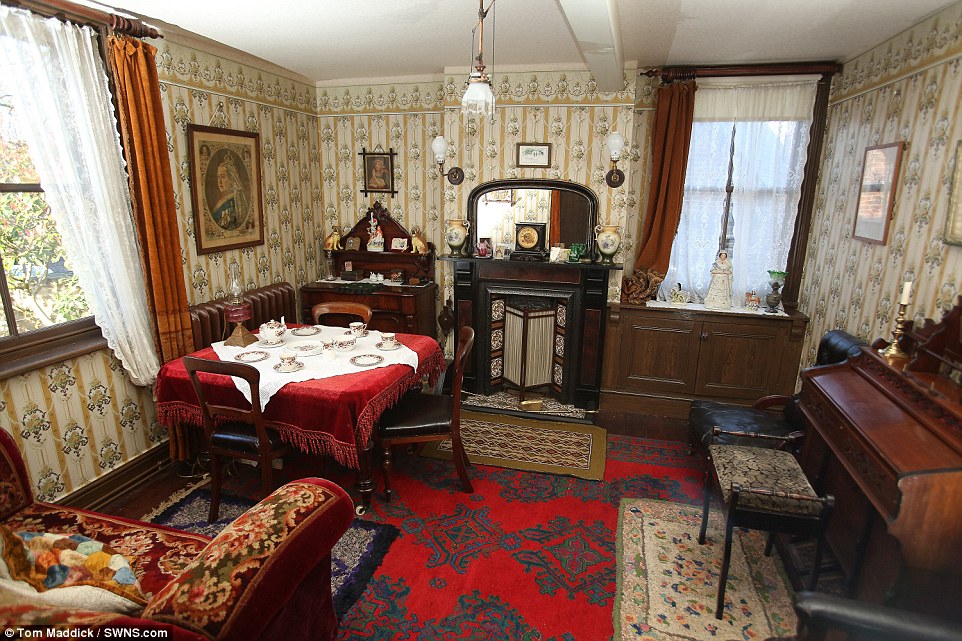
At this point I reintroduced the 1900s layout by rebuilding the dividing wall that opened into the dining room.
As part of this period house restoration scheme I purchased furniture and ornaments more in the price range of the 1890s owner. He was miner with two sideline businesses. Bye bye stuffed birds!
Scheme 4
During earlier renovations I was lucky enough to find the original 1890s parlour paper under a later partition. Although I initially dismissed it as a 1970s garish paper!
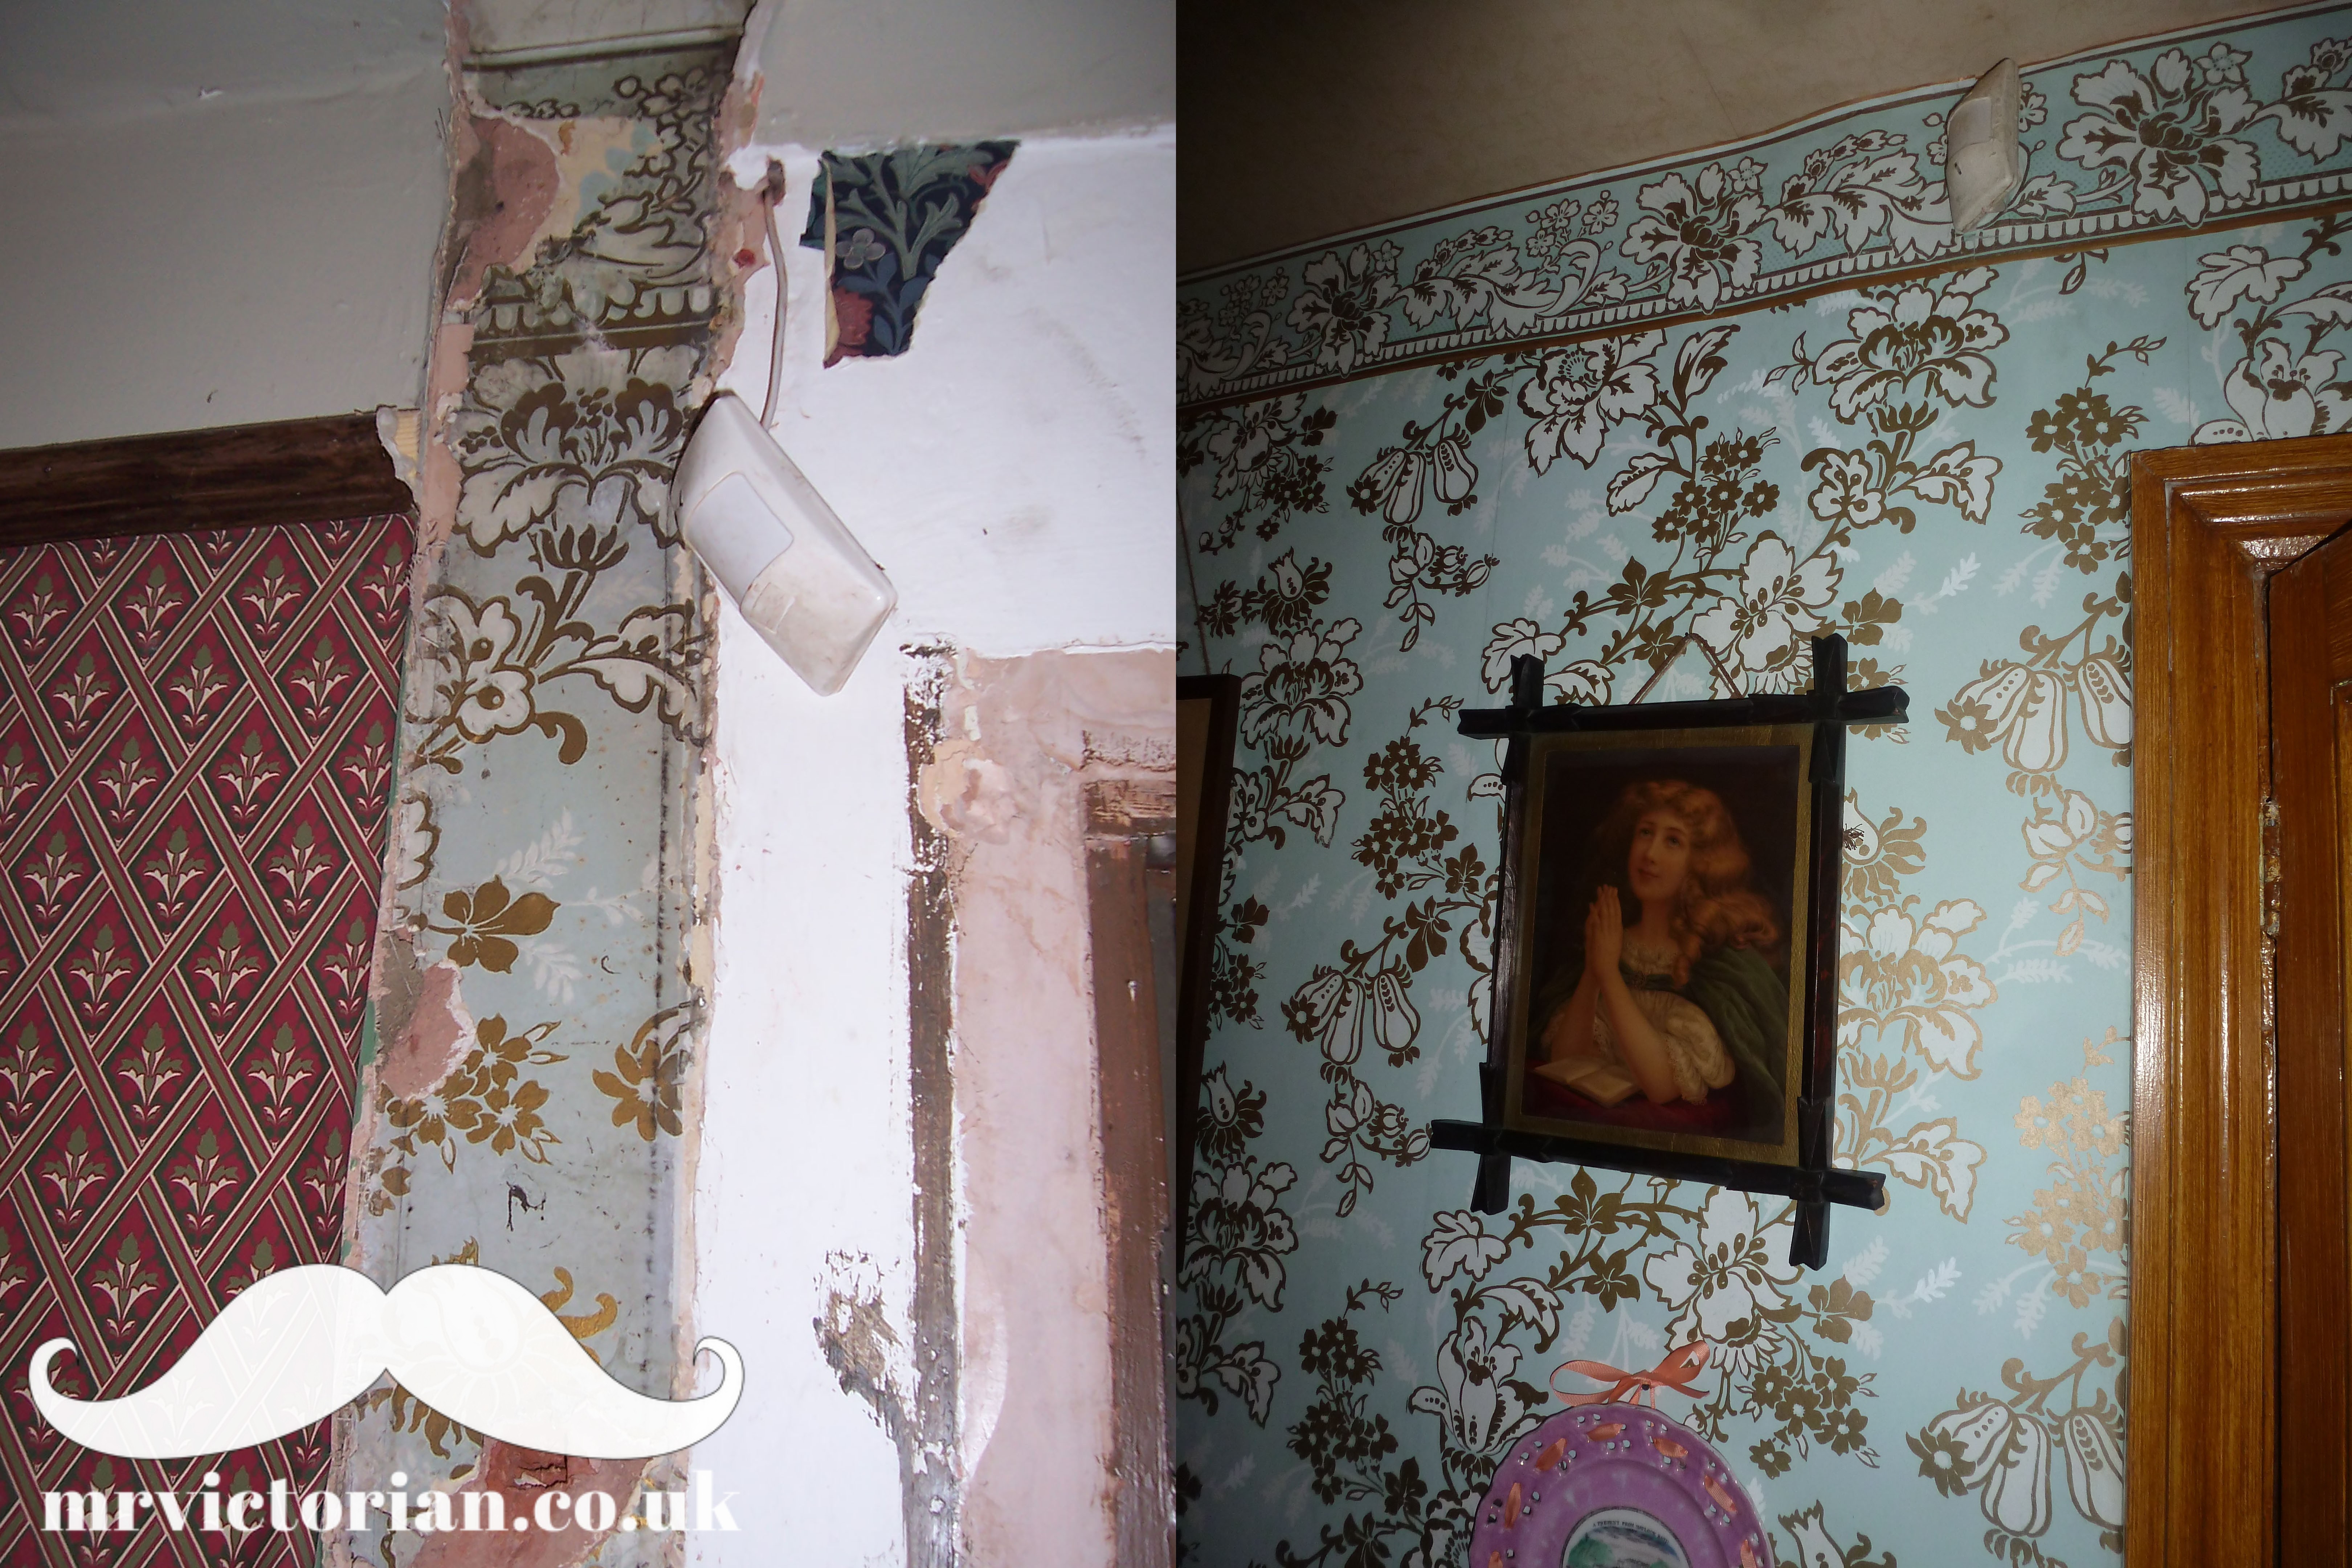
After scrapping back five layers of papers in the electric cupboard, I found this was the room’s original paper.
I knew getting a wallpaper company to reproduce this complex pattern would be out of my price range. However, I was confident I could redraw it’s cartoon-like floral design to reduce costs.
After getting various quotes specialists Hamilton-Weston Wallpapers was selected to reproduce this paper.
I wanted to replicate its original gold metallic finish outline and only the more expensive screen printing process could do this.
My mantra is if you’re going to do something in life do it properly!
Hamilton-Weston advised I could reduce costs further if I also drew the transfers for the screen printing.
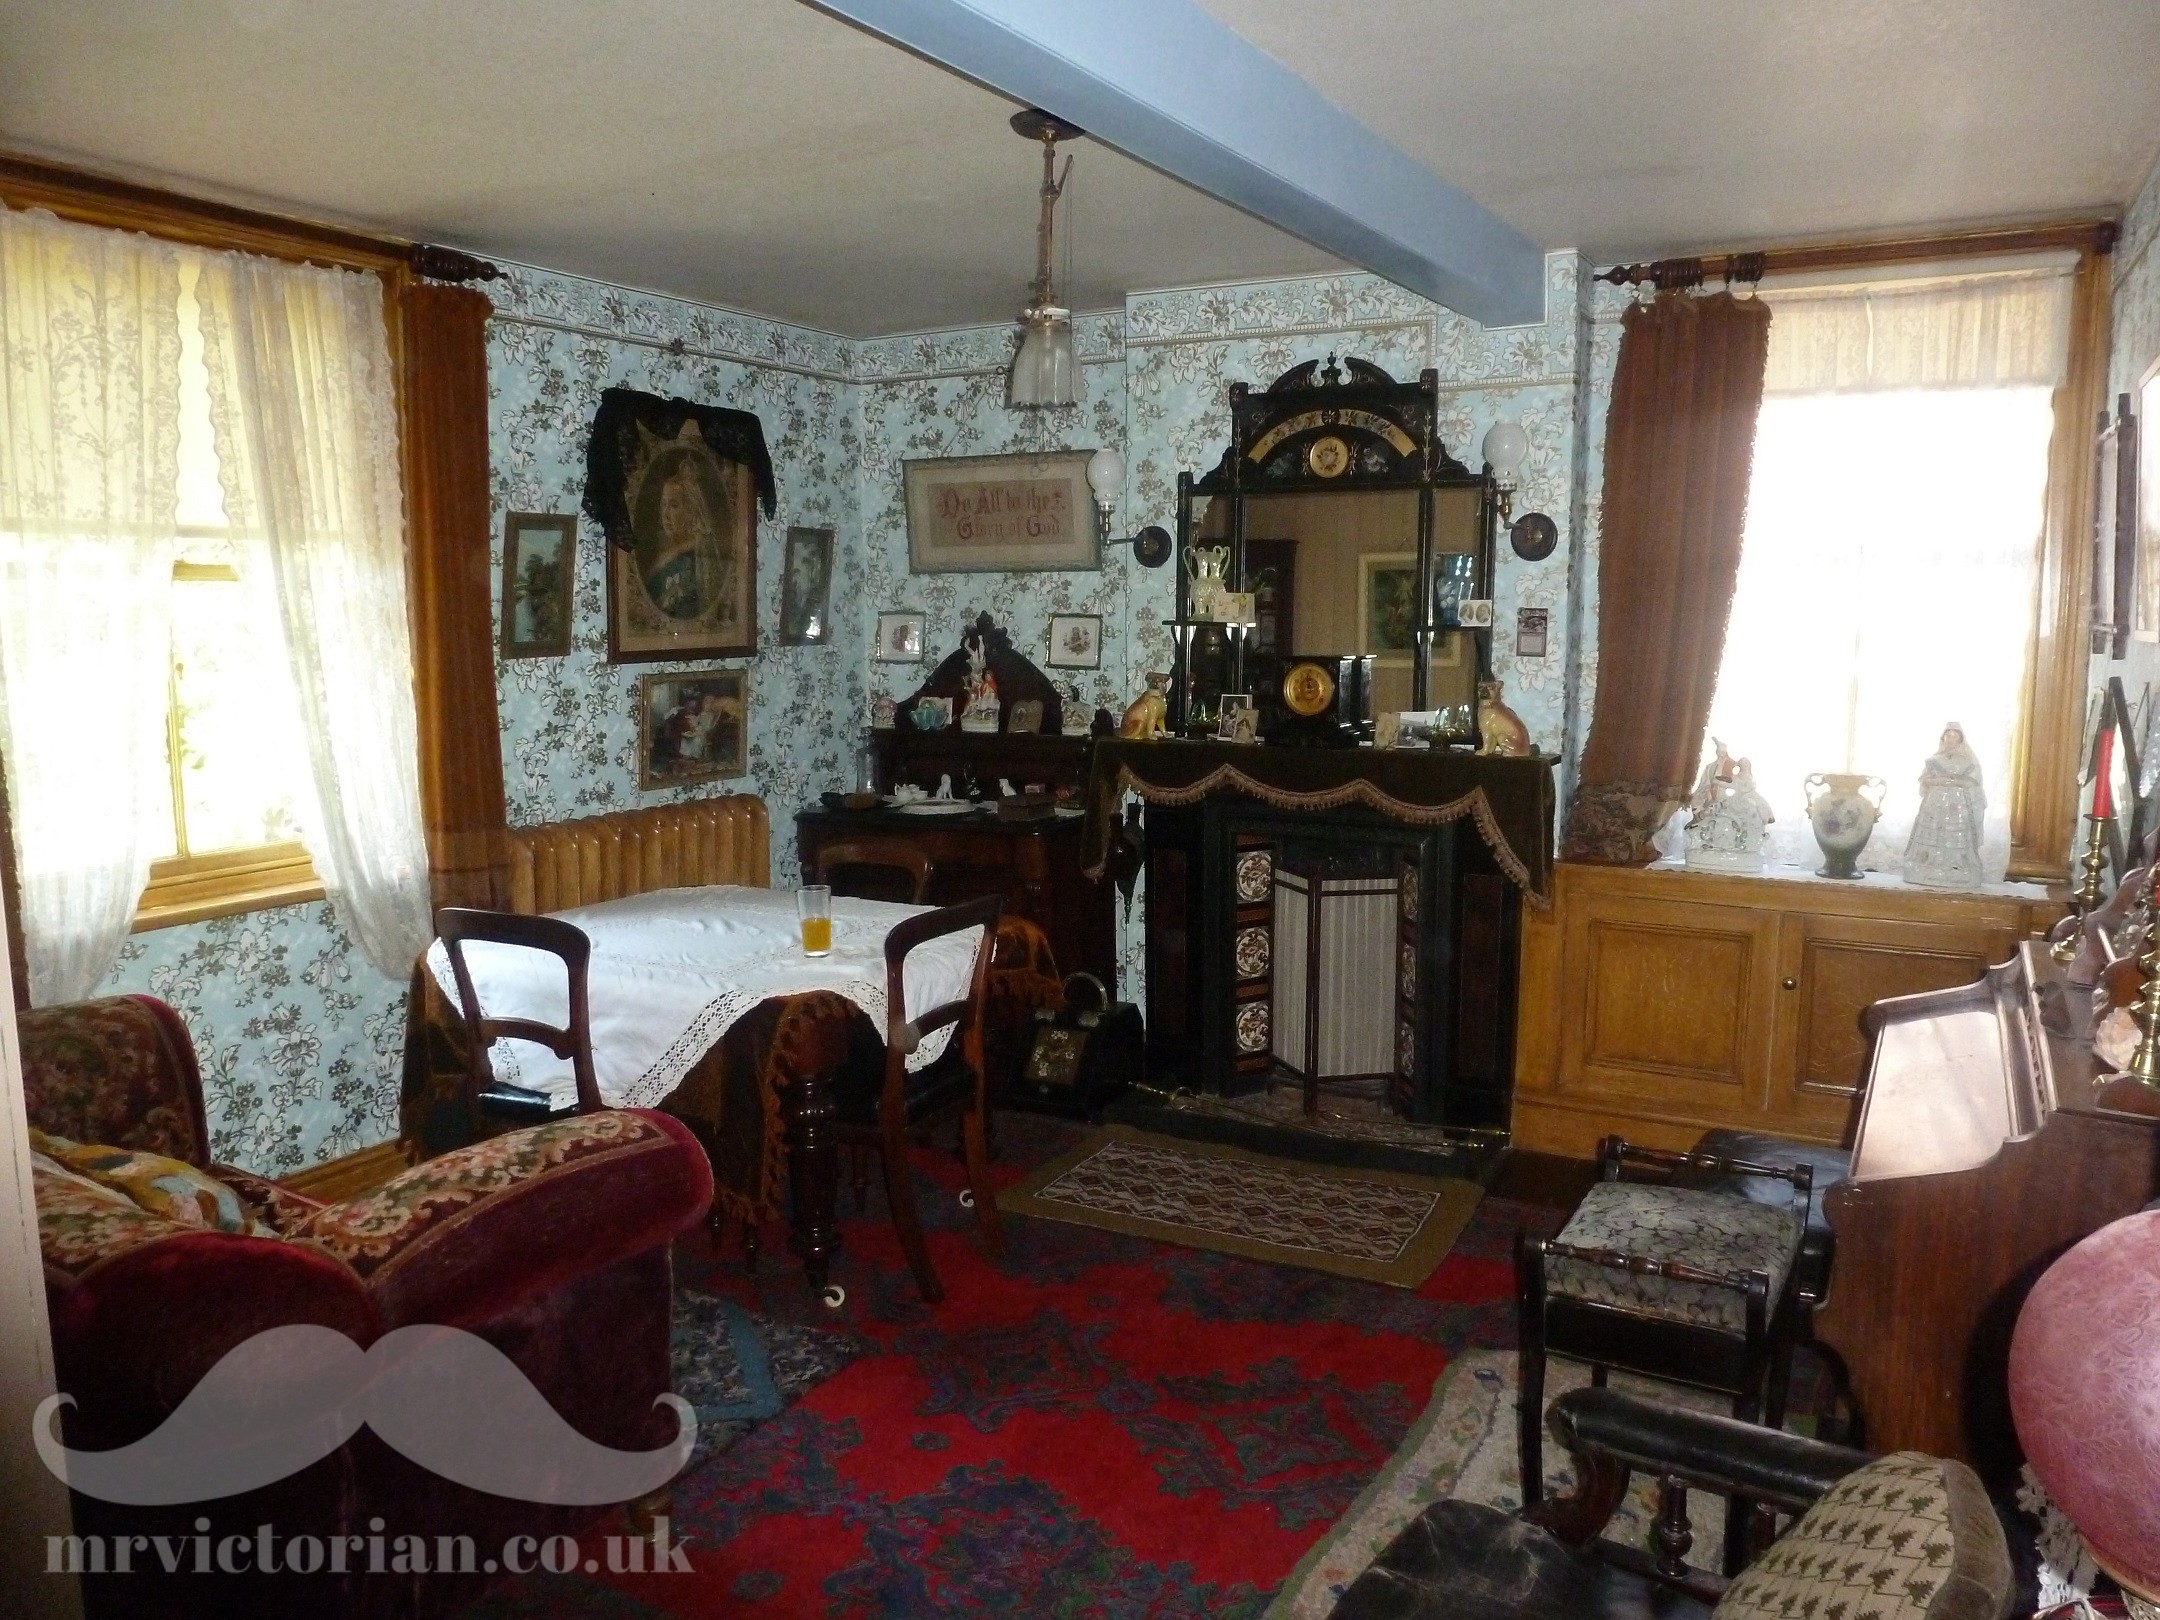
This wallpaper and border, titled Chapel Street Floral, is available to purchase from Hamilton Weston Wallpapers.
I also used the services of conservators Crick-Smith. They found the room’s woodwork was originally woodgrained a ‘medium oak’ colour and the beam was painted a light blue to match the wallpaper.
I’ll go into more details about how I redesigned this wallpaper in later blogs and reached the parlour’s latest look. (Notice I never say ‘finished’!).
Period house restoration – lessons learned
My main advice for any Victorian house restoration is take your time and carefully decide which direction you want to take with your project.
Like many new homeowners, I rushed into home renovations and made a lot of mistakes, mainly due to me not having a clear vision and inexperience.
I’m a strong believer in listening to your home and you only gain that feedback by living in your home for a while before getting the hammer and chisel out!
As my parlour’s incarnations show, there are four options for a period restoration:
- a few period touches with wall colours and antiques
- loosely replicating a certain period with a focus on antiques and décor that you love regardless of your house’s status
- a more slavish approach using wallpapers designed during a certain period and selecting antique furniture and fittings in keeping with your house’s original status
- replicating wallpapers and colour schemes original to your house where possible
Be clear on your direction from the outset to avoid re-doing things!
If you’re doing something because it’s cheap or easy and you have that niggling feeling that it won’t work, don’t do it! Go with your instincts and you can’t go wrong.
Leave a Reply